Create your first event, add your guests, and arrange the seating.
Welcome to Vesavo. Here's the lay of the land so you can get your event set up quickly.
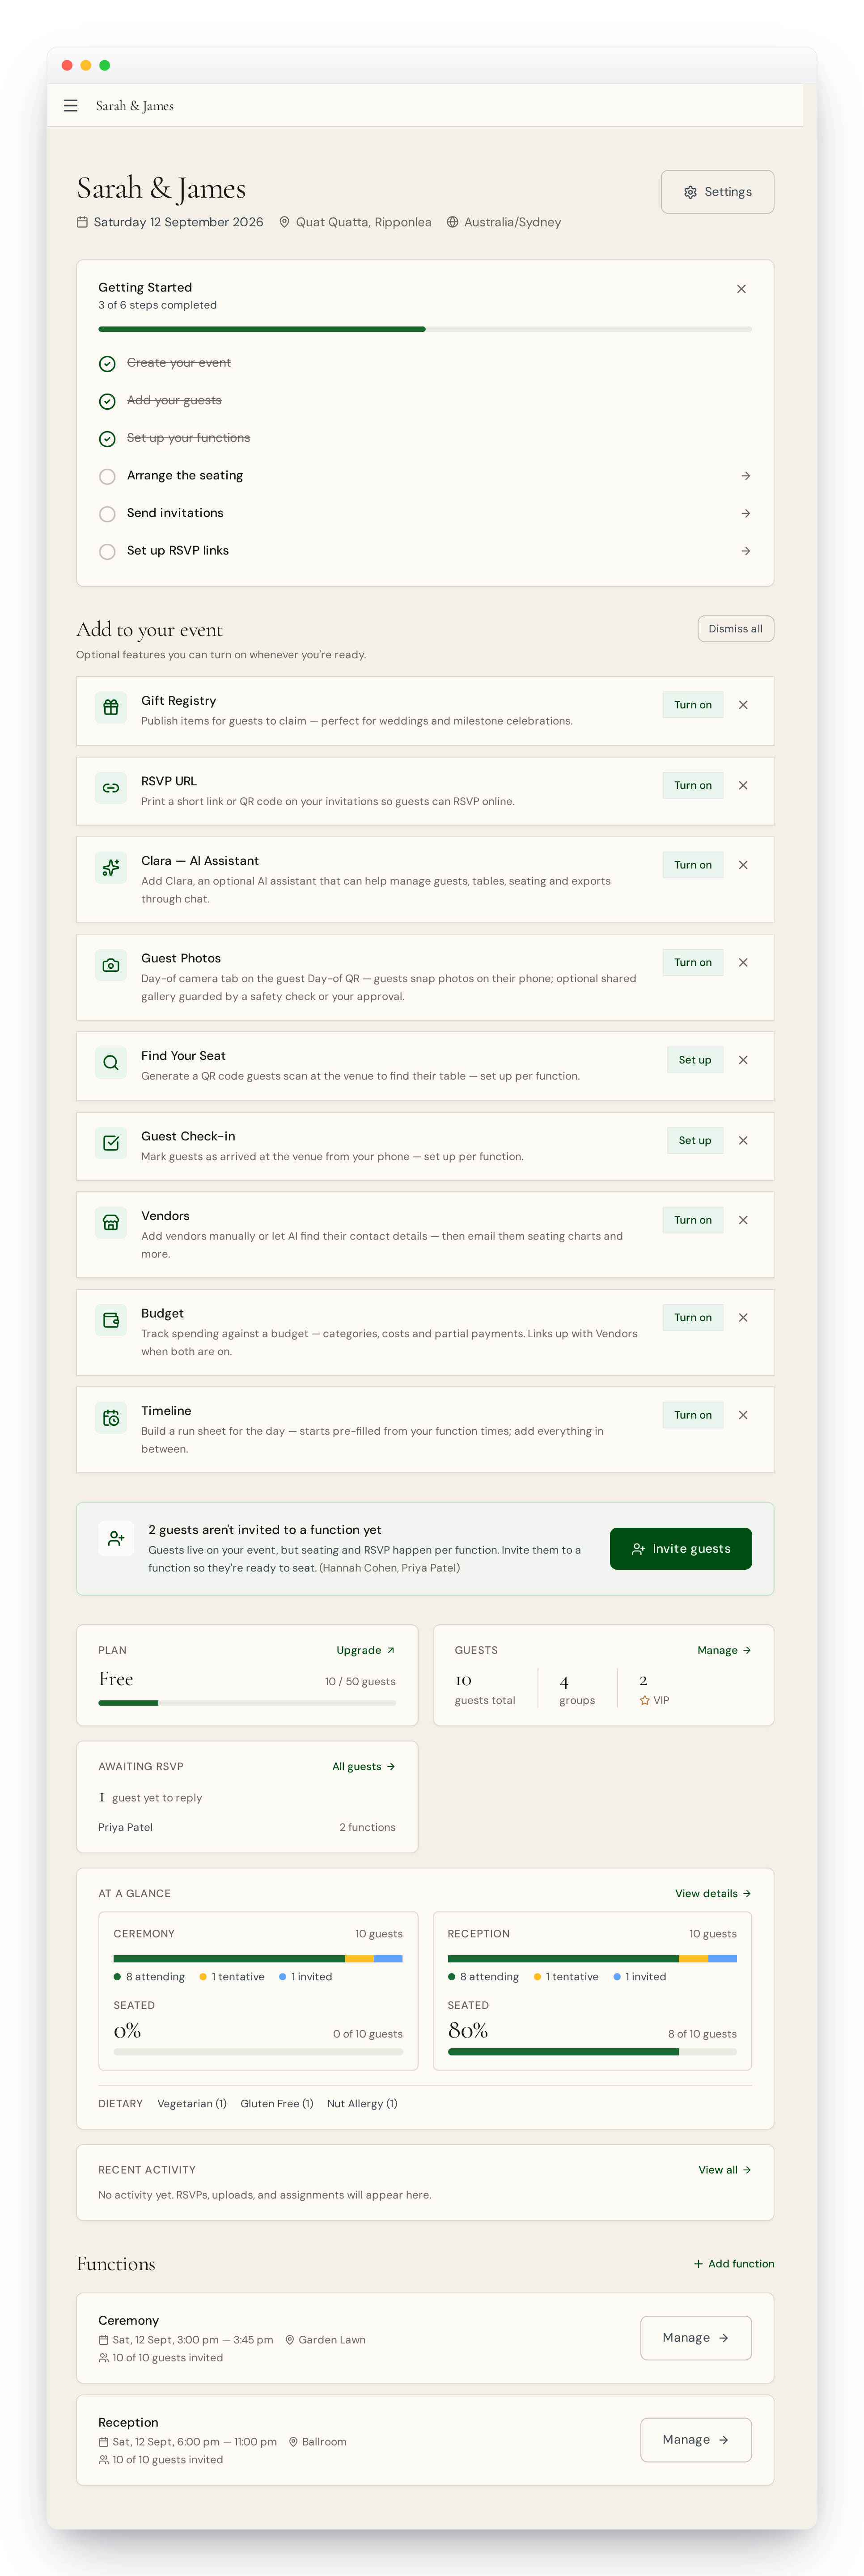
1. Create your event
Click New event, give it a name, pick a date and timezone. You'll be asked whether your event is just one thing or has several parts — see "Events and functions explained" if you're not sure. You can change any of this later.
2. Add your guests
Go to Guests and upload a spreadsheet — Intelligent Import reads the columns for you — or add people by hand. Dietary requirements, groups and VIPs are picked up automatically from your file.
3. Invite guests to your functions
Guests live on your event, but RSVPs and seating happen per function. If your event is a single thing, your guests are invited to it automatically. If it has several parts, choose which functions each guest belongs to — see "Inviting guests to functions".
4. Arrange the seating
Add your tables, then let Smart Seating place everyone in one click — keeping families together and spreading VIPs around. Drag anyone to fine-tune.
5. Make it your own
Turn on only the extras you need — a gift registry, guest photos, a budget, and more — from Features. Anything you don't enable stays out of your way.
Stuck at any point? Email us at [email protected] and we'll unblock you quickly.