
Share a link or QR code and let guests submit their own details and party — you approve each one into your guest list.
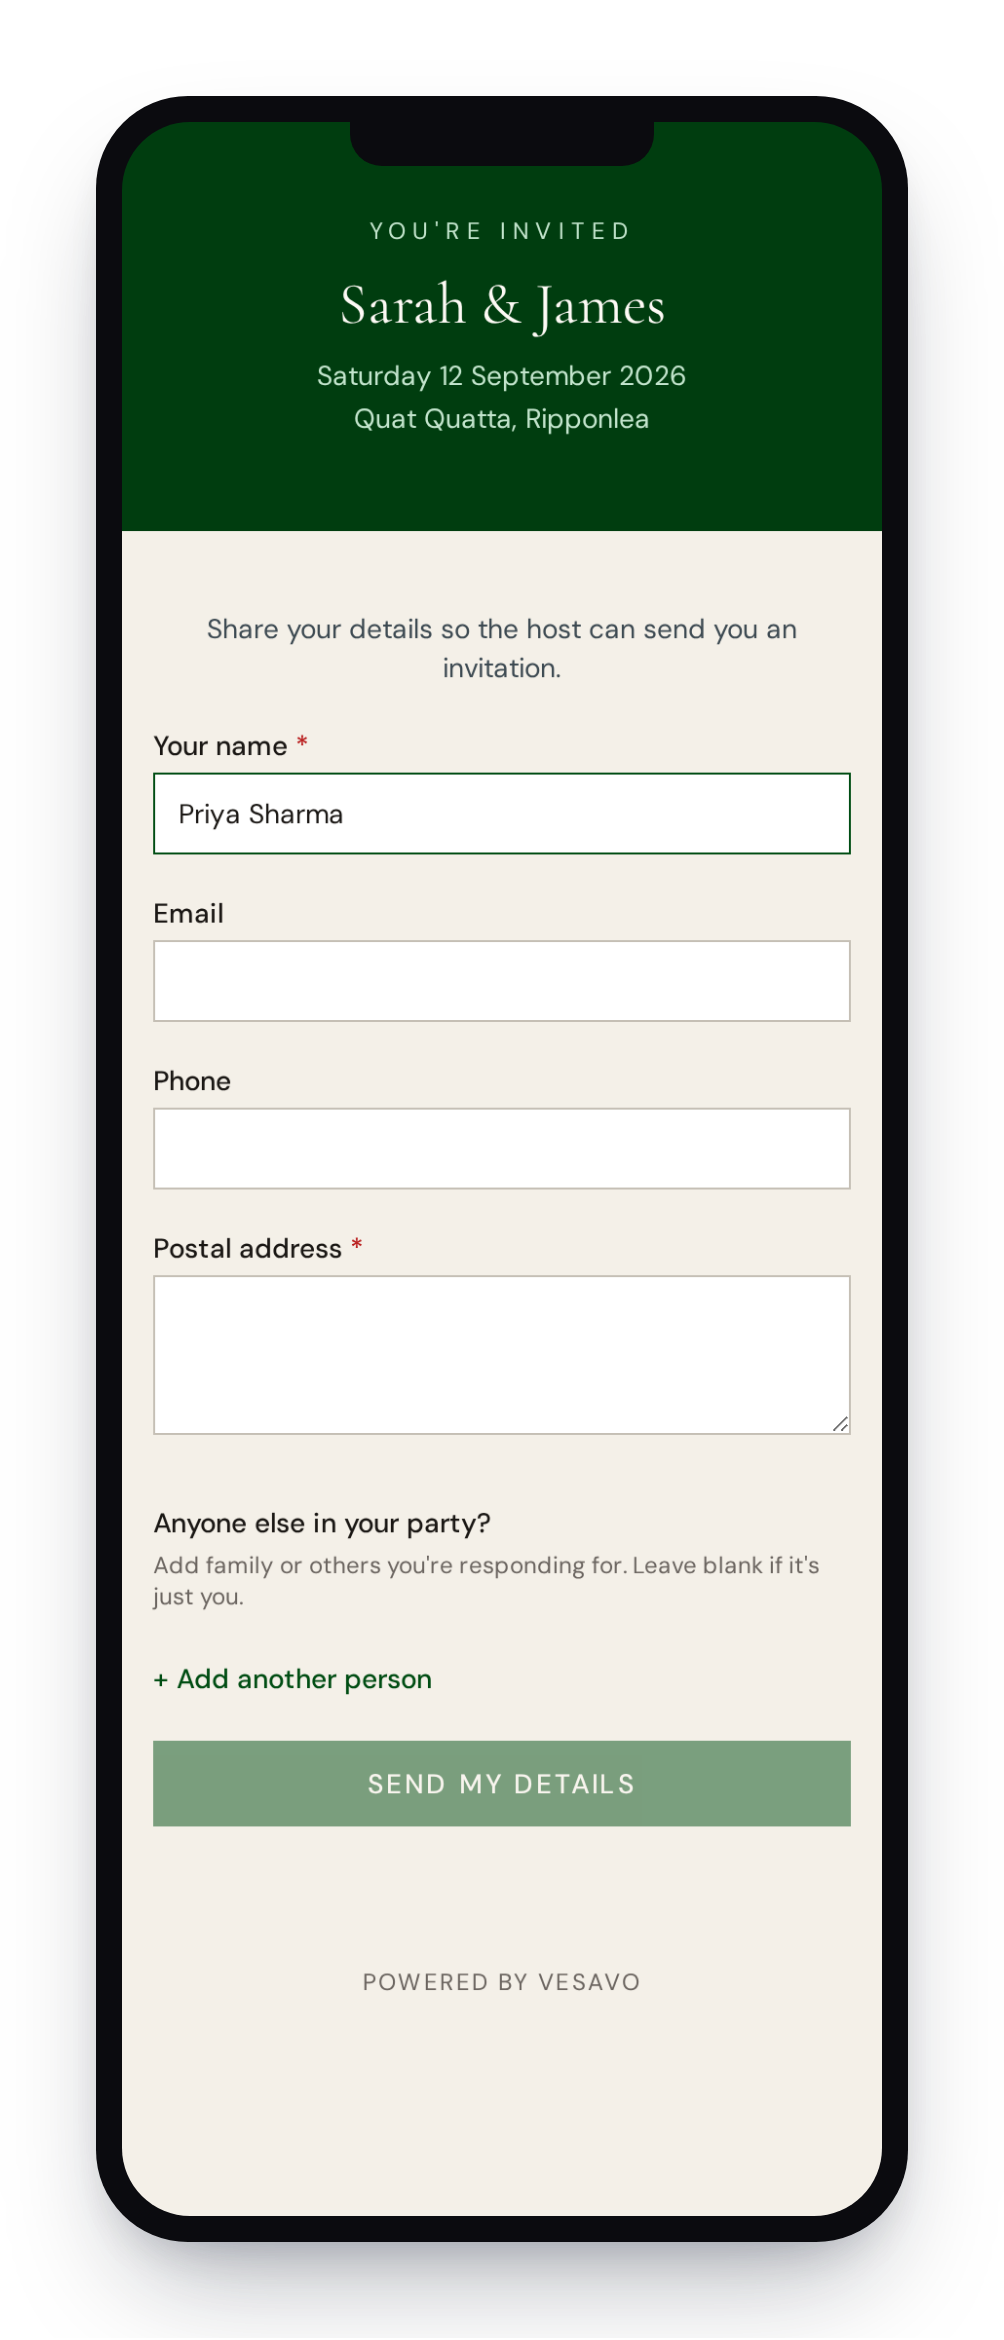
When you're early in planning — sending a save the date, or you simply don't have everyone's details yet — you can let people fill in their own. Share a link or a QR code, and each person submits their name, contact details, and anyone in their party. Everything lands in an inbox for you to review and approve into your guest list.
It's a natural fit for a printed save the date: put the QR code on the card, and guests scan it to tell you how to reach them.
Turning it on
Contact collection is an optional feature. Turn it on from the "Add to your event" cards on your event overview, or from Event Settings, under Features. Once it's on, a Collection inbox appears at the top of the Guest Management menu — it's the first step in gathering your guests, so it sits above your guest list.
Your link and QR code
Open the Collection inbox and go to the Link & QR tab. There you'll find a shareable link and a matching QR code. Print the QR on a save the date, drop the link into an email or a message — anyone who opens it can submit their details.
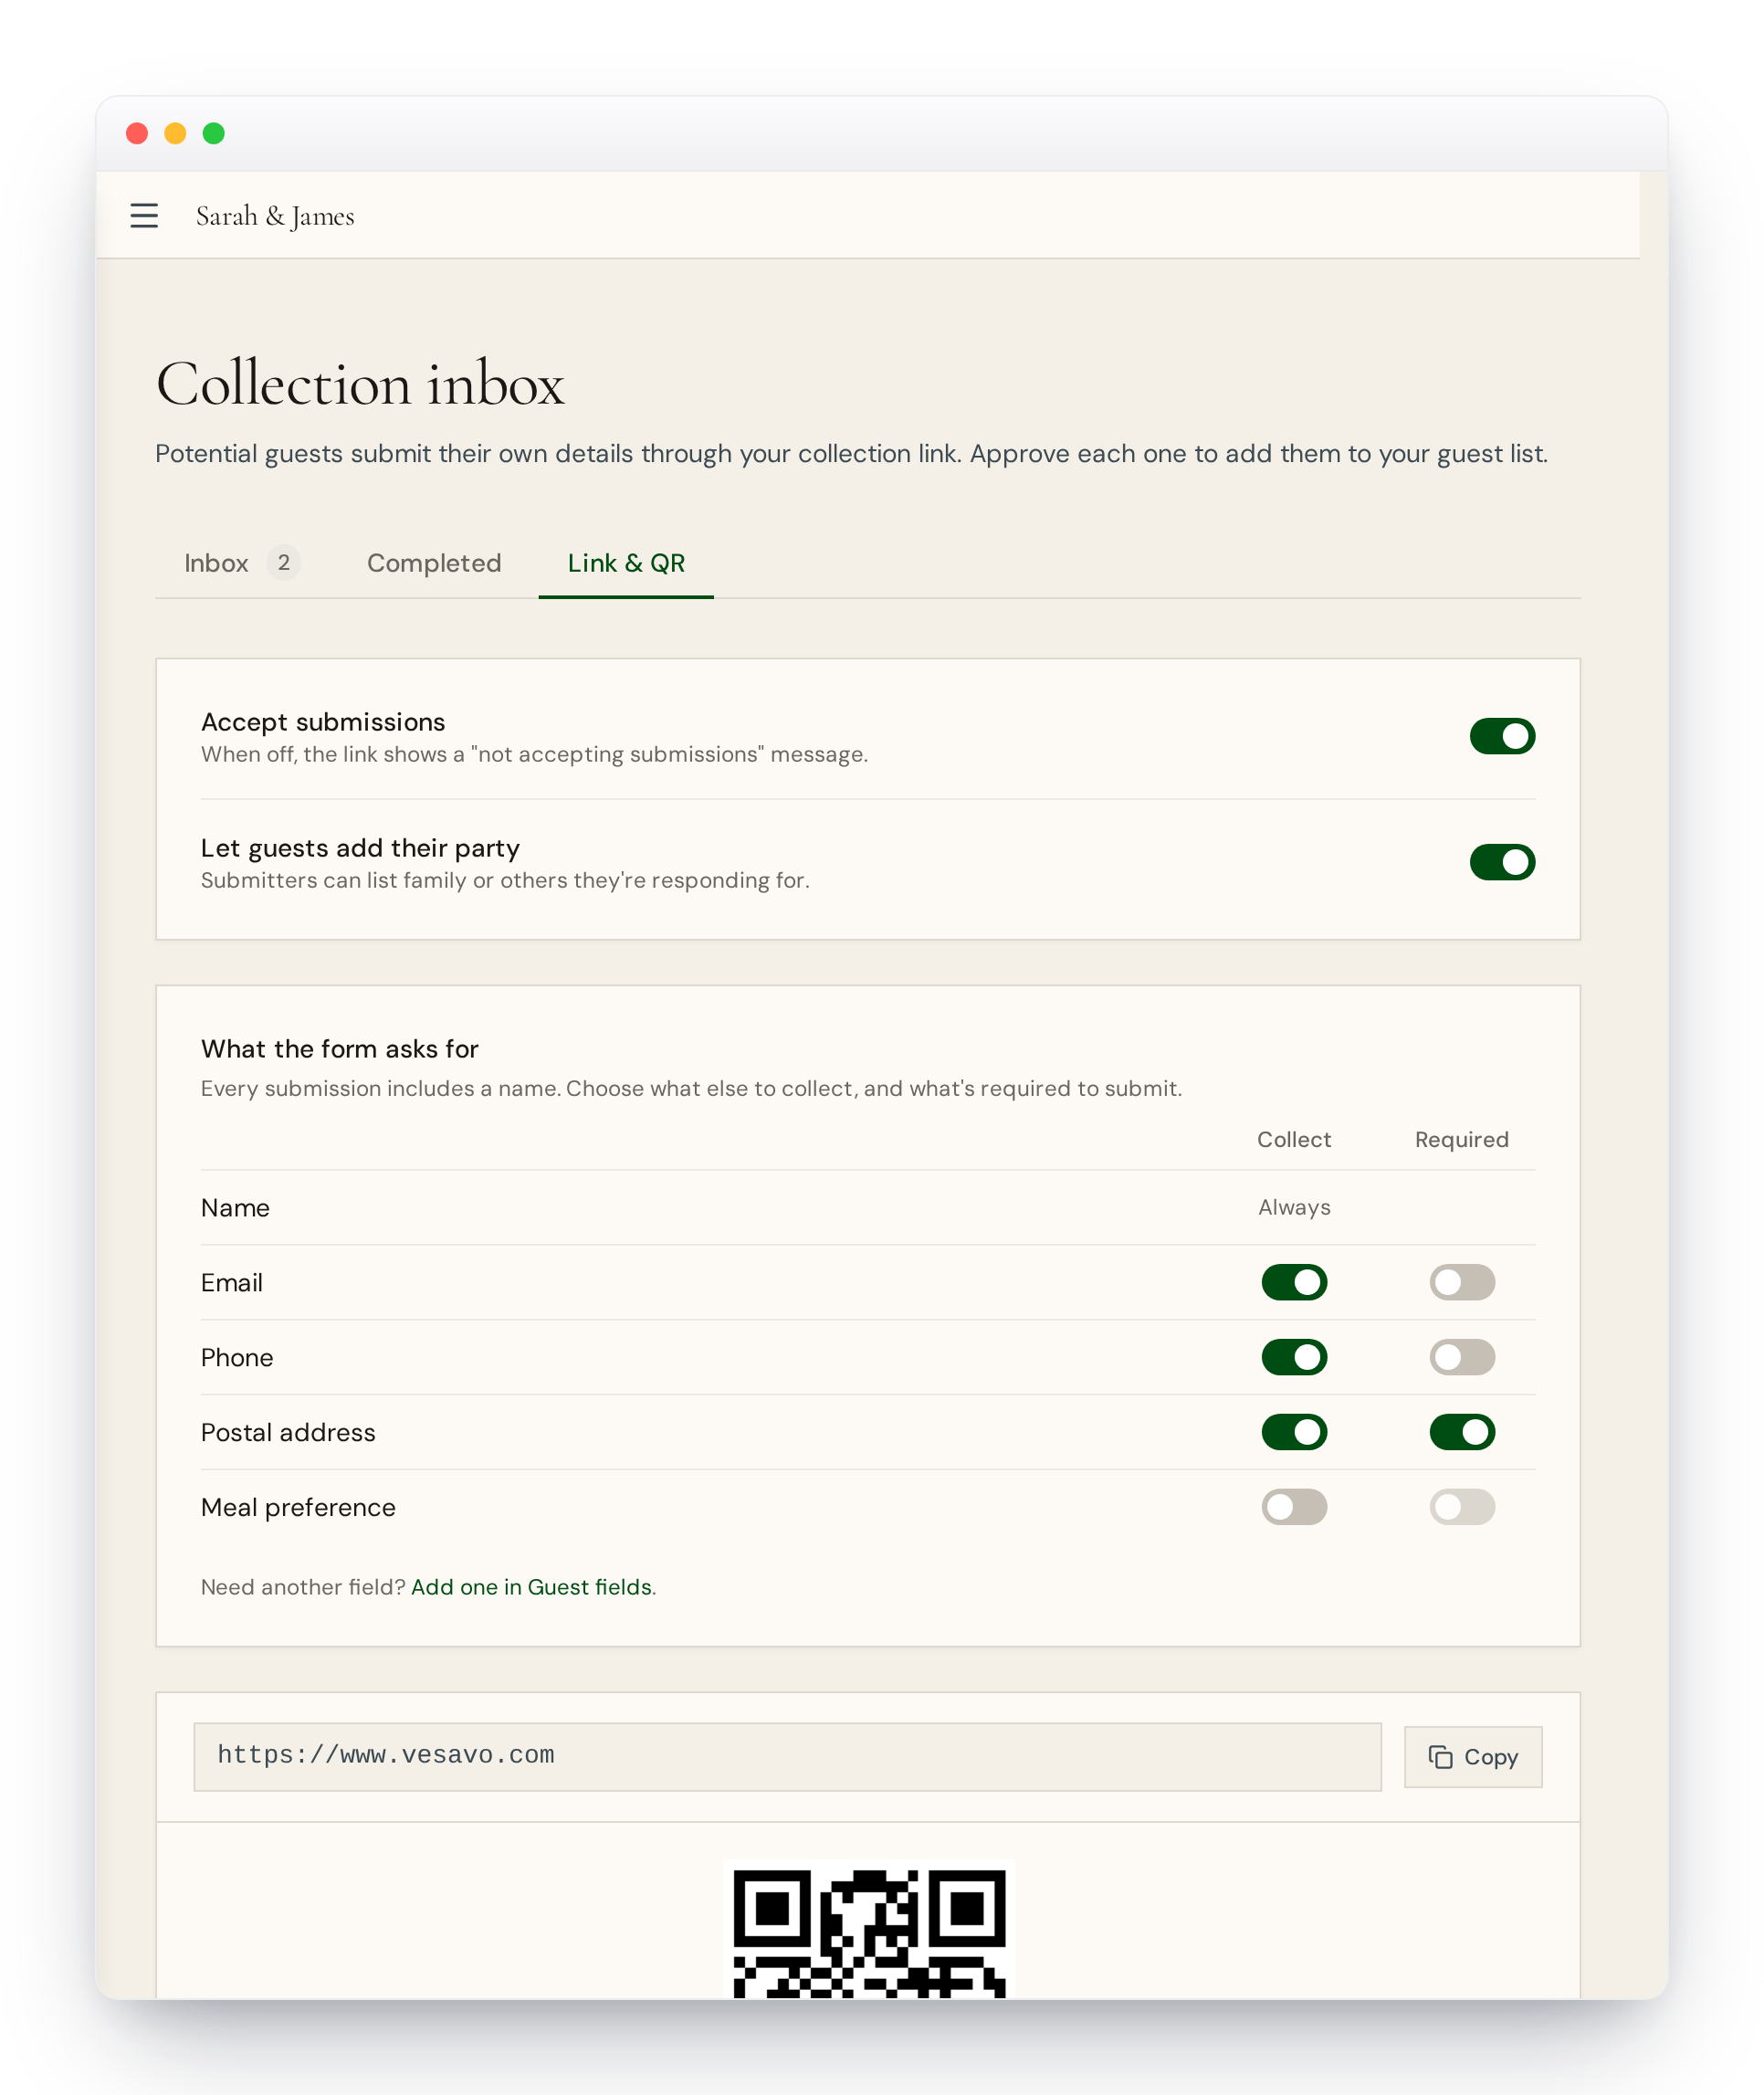
You can pause collection at any time with the "Accept submissions" toggle. While it's off, anyone who opens the link sees a friendly "not accepting details" message instead of the form.
Choosing what the form asks for
Every submission includes a name. Under "What the form asks for" you decide what else to collect, and what a guest must provide before they can submit:
- Email — used to send the invitation.
- Phone and postal address — built in and ready to collect, ideal if you're posting physical invitations.
- Any custom fields you've added.
For each one, tick Collect to put it on the form, and Required if a guest must fill it in to submit. A guest who leaves a required field blank can't send the form until it's filled.
Adding your own fields
Want to collect something else — a meal preference, a table request, a note? Add a field first. Fields live on the Guests page, under the Fields tab (there's a shortcut to it from the Collection inbox). Give the field a name and a type: short text, long text, phone, or email.
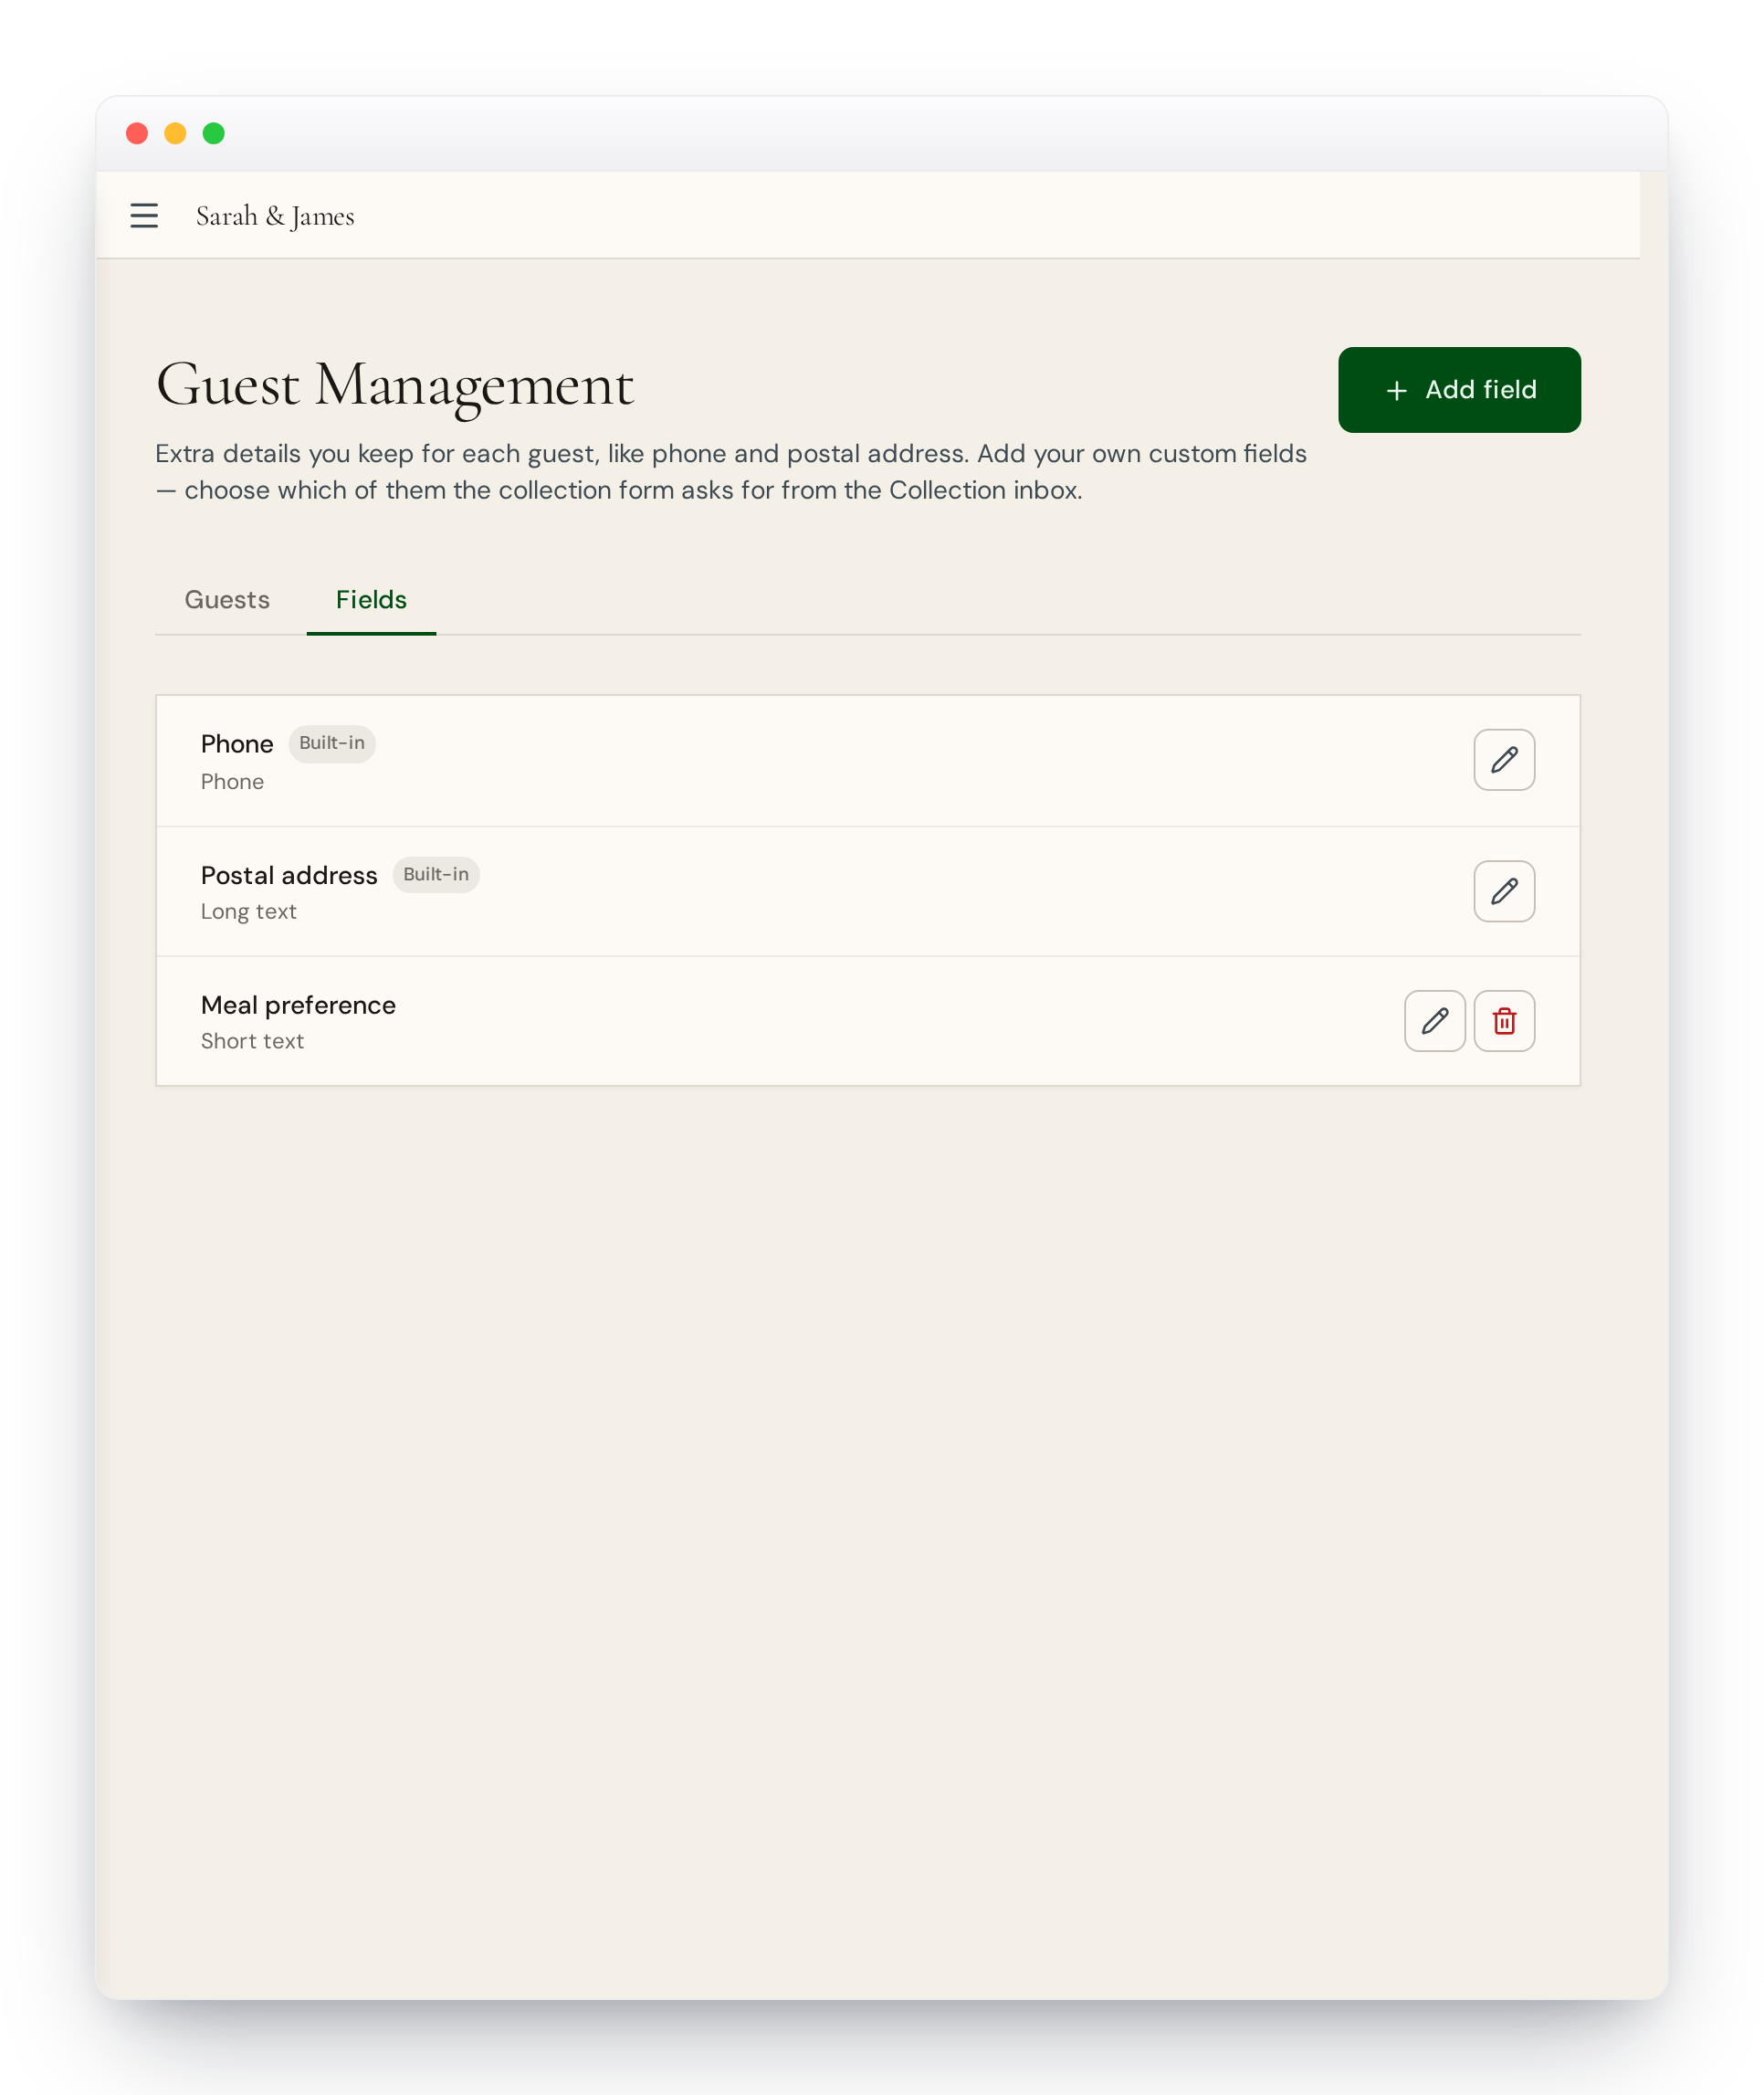
Phone and Postal address are there from the start and can't be removed, though you can rename them. Once a field exists, head back to the Collection inbox and tick Collect to add it to the form.
Everything you collect also appears on each guest's own page, under Contact & details, so the details stay with the guest for later.
Letting guests bring their party
Turn on "Let guests add their party" and a submitter can list the other people they're responding for — one parent filling in the whole family, for example. When you approve them, they're created together as a single group.
Approving submissions
New submissions arrive in the Inbox tab. Open one to review it — tidy the name, adjust any details, and remove anyone who shouldn't be added — then Approve or Reject.
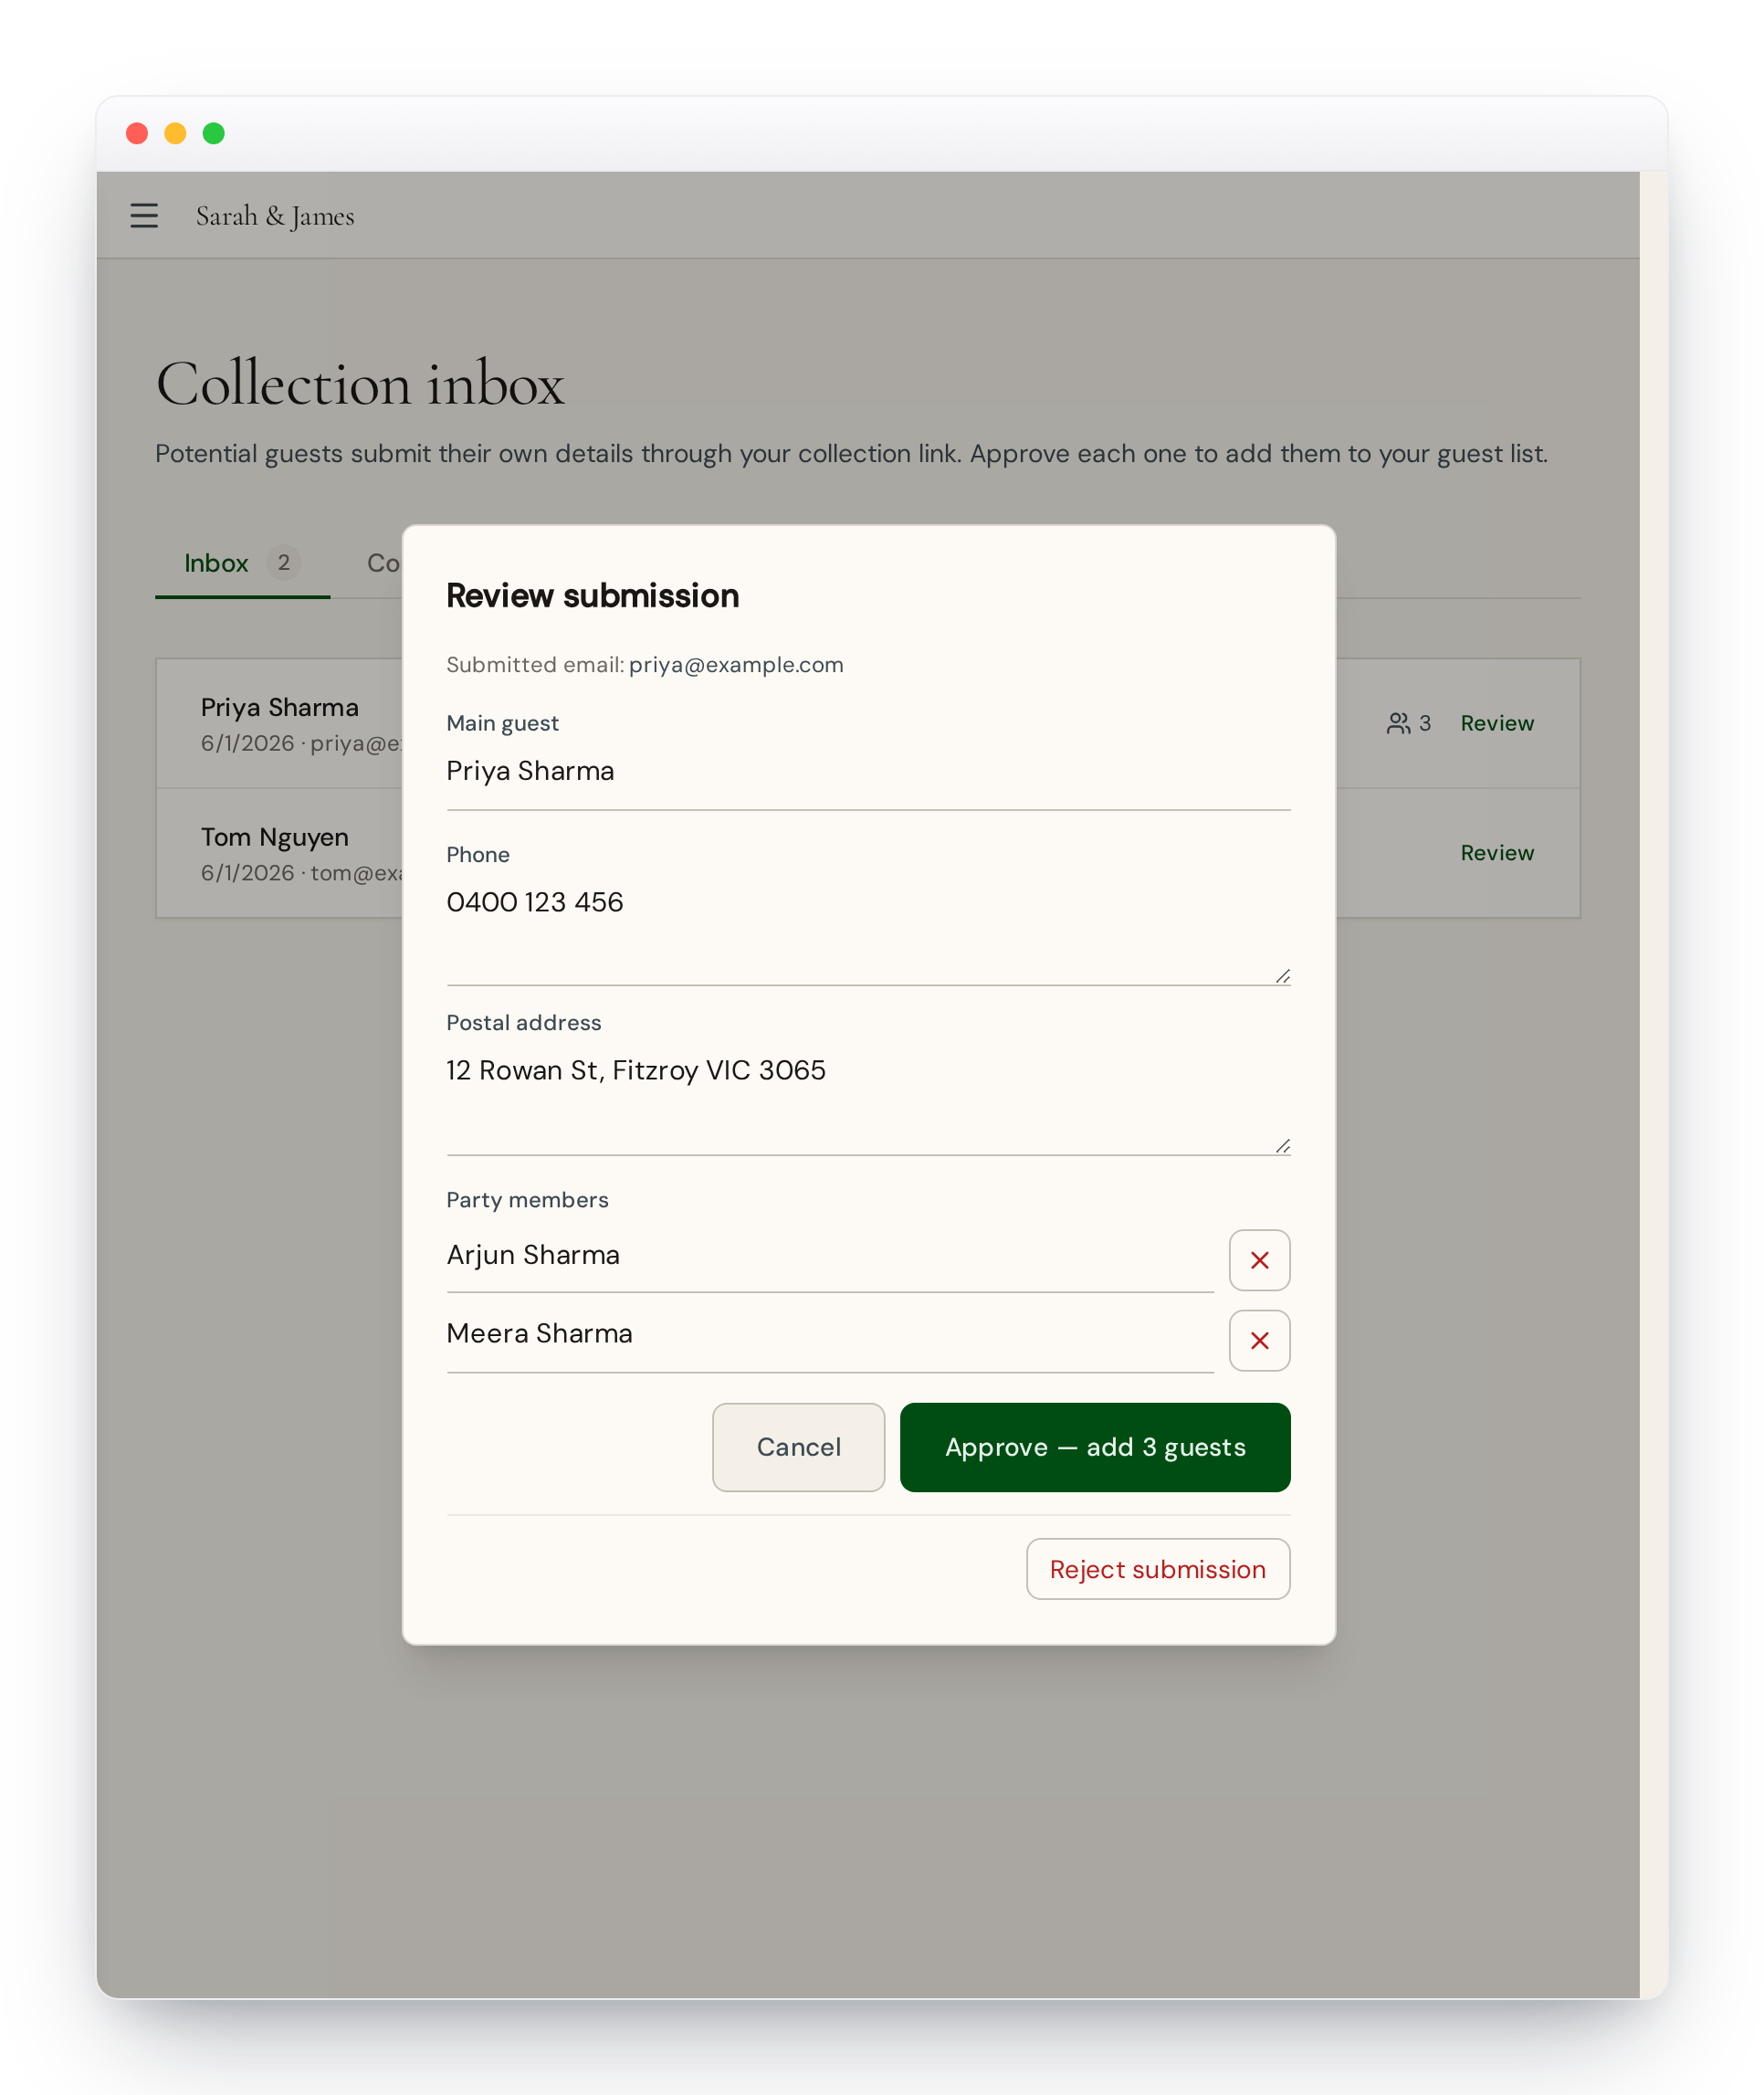
Approving adds the people to your guest list. Because a submission is usually a household, they're created as one group set to Shared RSVP, so they respond together — you can change that afterwards if you'd rather they replied separately. Rejecting sets the submission aside.
Guests can always submit — they never hit a "no space" message. Your plan limit is only checked when you approve. If a party won't fit in your remaining space, you'll be asked to upgrade or drop a few party members first, so a full inbox never turns anyone away.
Keeping track
Approved and rejected submissions move to the Completed tab, each marked so you can see at a glance what happened. For an approved one, a link takes you straight to the group that was created from it.